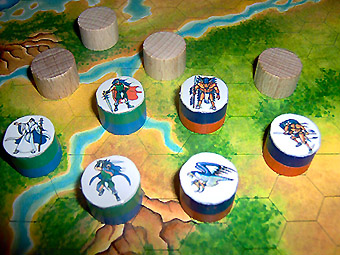
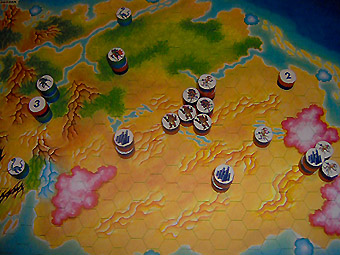
BATTLE SAMPLE

Immortal vs Redskins.

This is an historical battle due it was the first using these incredibly succesfull round woodeblocks.

In the picture from the left: one druid, the Master and one Immortal; the Master, one Hawk and one Bison of Redskins.

Behind see the rough woodenblocks before be painted with the service Create YOUR Warangel.

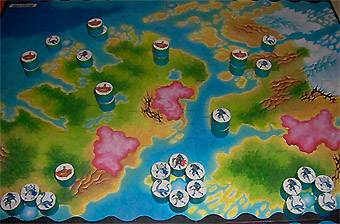
The player who leads the Redskins is faster, placing all his pieces on his map, and gains the right to move first. Redskins are ready to attack, note the Blue Hole not totally blocked: this placement is good when you are quick in placement, achieving first move. With the advantage of first move, these warriors are ready to invade enemy territories.

This is a risky placement if you do not move first, due this dimensional door is NOT totally blocked: remain free two sea hexes adjacent to the Blue Hole, from where enemy army may enter to start its invasion.

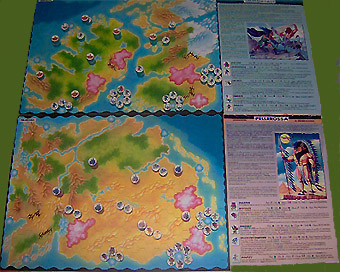
The two players declare to have completed their placements and screens between maps are removed. Here the two races placed on own maps with their own Reference Sheets.

Above Irelad and Highlands of Immortals, under Little Big Horn of Redskins.

As you see each single Race has an own Map that matches a sector of our Earth. Here you see the complete list of available RACES and MAPS.

You can play Warangel with 2, 3, 4, 5, 6 players. Each player places his army on own map. In two players a battle is about 1 hour; add half an hour for each players more.

As you see, Redskins, that completed their placement first and achieved first move, found all three matching Blue Holes in enemy map totally blocked by enemy warriors.

Here a close up of Immortal's Maps. All south Blue Holes are perfectly sorrounded and blocked.

To block first left Blue Hole, only three warriors are requested, due Hole other three hexes are closed by Map's border. Central Blue Hole is an internal one and so 6 warriors are requested to sorround it. The Hole on the right is closed on one hex by Map's border, so only 5 warriors are sufficent to block it.

On northern right sector, note a "Nessie", one of the monstruous Elasmosaurs used by Immortals as War-Surf, placed along the Lock Ness.

As you see here, all three Blue Holes from where Redskins are ready to invade, have their matching Holes on Immortals' Maps totally blocked. Armies' placement is played with screens up amongs Maps, without knowing enemy disposition. To invade, you have to pass through free or not totally bocked Blue Holes. Immortals placed an optimal defensive placement, perfectly blocking 4 passages to their territory.

Redskins decide to use two groups of Falcons to start invasions, passing through Blue Holes of the north border, that are not blocked by Immortals. Moving 14 hexes per turn, these speedy flying warriors achieve to conquer two Fortresses of Immortals. But to win is not enough conquer: you have to keep the control of enemy Fortresses at beginning of your turn.

Immortals are forced to move to north, to regain gontrol of their Fortresses. In this way they unlock southern passages, opening invasion of main part of Redskins' Army.

A furious battle begins, but on a territory where Immortals are naturally advantaged, thanks to their Sea Transports, while charges of Bisonts are limited in very closed plains.

On third turn, Redskins are forced to retire: Immortals regained control of their nortern Fortresses and moving along LittleBig Horn river, penetrated with their mounted Nessies in enemy Map, conquering the 3 Resource Point Redskins Fortress. Grizzlyes on Defence try to counter attack but result too slow. Immortal did a perfect defensive placement and used at best characteristics of enemy map, using rivers as "invasion highways" to move fastly and win.